- Exploring LED Control Systems WiFi, Zigbee, RF
- 0 likes
- 1090 views
- V5L(WT) Controller, Tuya App Setup, LED Remote Control, Multi-Zone LED Control, RGB Strip Setup, RGBW LED Strips, 5 in 1 LED Controller, RGB+CCT Strips, Tuya Integration, LED Remote Matching, LED Strip Compatibility
The Tuya app plays a vital role in controlling and managing the setup effectively, making it easier to switch between different lighting configurations. This guide will walk you through configuring controllers to handle multiple zones, as well as setting them up for various LED strip types, including RGB, RGBW, tunable white (CCT), and more.
Step 1: Understanding the Controller and Remote Control
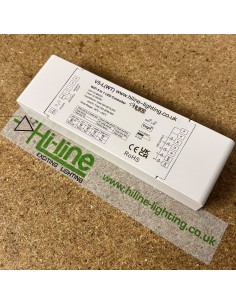
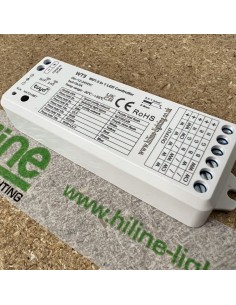
The HL-V5L(WT) LED controllers are versatile '5 in 1' devices that can control different types of LED strips, such as single colour, RGB, RGBW, tunable white (CCT), and even RGB + CCT. Unlike some controllers that are specific to certain types of strips and cannot be changed, these '5 in 1' controllers offer flexibility, allowing you to adjust them for any kind of LED strip based on your needs. Unlike some controllers that are specific to certain types of strips and cannot be changed, these '5 in 1' controllers offer flexibility, allowing you to adjust them for any kind of LED strip based on your needs. The first step in configuring your system is to determine the type of LED strip you are working with and ensure you have the appropriate remote control or app setup to manage it. It is crucial to first set up the HL-V5L(WT) controller correctly, selecting the strip type using the DIP switches. This step is very important to ensure proper functionality. Additionally, if you choose to use a remote control instead of the Tuya app, make sure that the remote control matches your LED strip type, whether it is single colour, RGB, RGBW, or RGB+CCT, and also supports the number of zones you intend to use.
Each controller can be paired with different remotes, depending on the configuration you need. For instance:
-
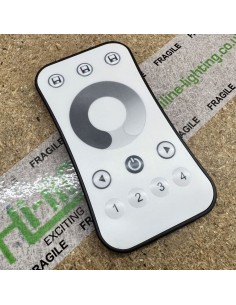
RGB and RGBW LED strips require a remote like the R8, which can handle up to 4 zones, or the R8-1 single zone controller, or other remotes such as the RS4.
-
For RGB+CCT strips or advanced setups, ensure you select a compatible remote control such as the HL-RS10-RGBCCT, which can handle 4 zones, or the HL-R17, which is suitable for single-zone control, or manage it directly using the Tuya app.
If you are not using a physical remote control and are managing everything through the Tuya app, it is still crucial to set the controllers to the correct mode that corresponds with the type of LED strip in use. The HL-V5L(WT) uses DIP switches to do so. Please check the datasheet from the 'Related Products' tab, where you can also find compatible remotes, and the 'Attachments' tab for the datasheet.
Step 2: Setting Up Multiple Zones
One of the powerful features of these LED controllers is their ability to manage multiple zones. This allows you to control different LED strips independently, even if they are part of the same overall setup. To set up multiple zones:
-
Match the Remote to the Controller Zones: To match a remote control with each controller, use the controller's Match key. Here is how:
-
Short press the Match key on the controller.
-
Immediately press the desired zone key (1, 2, 3, or 4) on the remote control.
-
This will pair the remote to the controller, allowing you to independently control different zones.
-
For example, if you have two RGB strips and want them to function independently, you can assign one strip to Zone 1 and the other to Zone 2. This way, each strip can be controlled separately via the corresponding zone on the remote.
Step 3: Configuring the RGB Settings
Before adding the controllers to the Tuya app, it's essential to configure the settings correctly based on the type of LED strip you are using. For RGB strips, you need to use the DIP switch located on the controller:
-
DIP Switch Configuration: Set the first DIP switch to the 'ON' position and the second DIP switch to 'OFF'. This configuration activates the red run indicator, which signifies that the controller is now set for RGB strip control.
If you have already added the controllers to the Tuya app, you will need to remove them, make these DIP switch adjustments, and then add them back to the app to ensure everything is correctly recognised.
Step 4: Using Tuya App for Smart Control
If you are controlling your LED setup through the Tuya app without a remote, you need to make sure that the settings on the controllers match the LED strip type you are using. The Tuya app will then allow you to control the brightness, colours, and other settings for each zone, provided that the controllers have been properly configured beforehand.
The Tuya app provides flexibility but requires that the hardware is set up accurately for the app to recognise the type of strip and provide the correct control options. Always ensure the DIP switches are set to match the LED strip type, whether it be single colour, RGB, RGBW, or CCT.
Summary
Setting up LED controllers like the HL-V5L(WT) for different zones and LED strip types requires understanding both the hardware settings and the software/app capabilities. Always start by identifying the type of LED strip and ensure you have the right remote or app setup for that strip. Use the DIP switch to set the controller correctly before pairing it with the Tuya app or remote control, and assign zones as needed to achieve independent control of multiple strips. This way, you can create a dynamic lighting environment, tailored to your preferences.


