- Under Cabinet Kitchen Lighting Ideas & Solutions
- 0 likes
- 233 views
- under-cabinet lighting, LED lighting, DIY lighting installation, linkable LED lights, aluminium LED profiles, cabinet lighting guide, kitchen lighting solutions, high CRI lighting, energy-efficient lighting, professional LED installation
The Ultimate Guide to Setting Up Linkable Under-Cabinet Lighting
Under-cabinet lighting is a fantastic way to add focused illumination to your workspace, be it in the kitchen, workshop, or any area requiring bright, even lighting. Our high-quality linkable under-cabinet lights, featuring a CRI (Colour Rendering Index) greater than 90, offer outstanding colour accuracy, ensuring your space is not only functional but visually appealing. In this guide, we’ll walk you through all the technical details and accessories you need to set up these lights effectively.
Choosing the Right Components
1. Selecting Your Under-Cabinet Lights
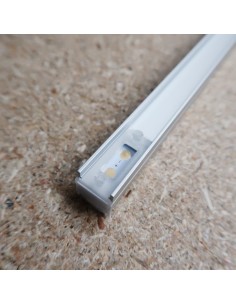
Our linkable under-cabinet lights operate at 24V DC and are available in various sizes. Each unit consumes 12W of power, providing bright, even illumination for your workspace. The high CRI (>90) ensures that colours appear vibrant and true to life, making these lights ideal for applications where accurate colour representation is crucial.
2. Linking Modules Together
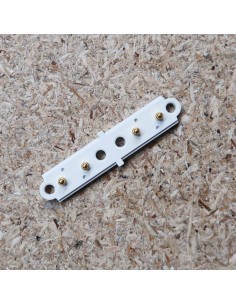
These lights can be linked seamlessly using our Seamless Joint Connector (Reference HL-UCL-SJC). This connector allows for multiple light modules to be joined without visible gaps, resulting in a streamlined, professional look. Linking the lights is simple—each light bar draws 12W of power, and you can connect as many as needed based on your setup requirements:
-
Two Light Bars: 2 x 12W = 24W Total Power
-
Three Light Bars: 3 x 12W = 36W Total Power
3. Choosing the Right Power Supply
To ensure optimal performance and reliability, it’s important to choose the correct power supply. A common mistake is to choose a power supply that matches the exact total wattage of the lights; however, this can lead to overloading and reduced lifespan of the components. We recommend adding at least 20% headroom to the total power requirement. This ensures that the power supply is not overworked and allows for better longevity and efficiency.
For example, if you are linking three light bars that consume a total of 36W, you should calculate the required power supply as follows:
-
36W x 1.2 (20% margin) = 43.2W
In this case, we recommend our 100W LED Driver (Reference HL-100W-24V-IP67-5Y). This power supply comfortably supports the load and ensures your lights work efficiently without being stressed. It also has a compact form factor, making it easy to hide during installation.
If you don't need a waterproof driver, you may consider an IP20-rated LED driver. This type of driver is suitable for dry, indoor areas where water exposure is not an issue. Whether to use a waterproof or non-waterproof driver will ultimately depend on your installation environment, and consulting a qualified electrician is advisable.
Accessories for a Complete Installation
1. Power Connector (Reference HL-UCL-PC24V)
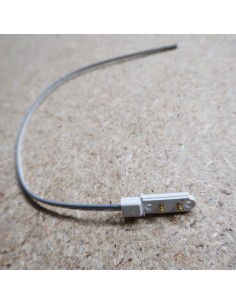
To start your lighting circuit, you will need a power connector. This connects the power supply to the first light in the sequence, enabling the entire chain of lights to be powered effectively. It is crucial for initiating the power flow throughout your system.
2. Extension Connector Cable (Reference HL-UCL-EXTCC)
If your design requires that the light bars be spaced apart instead of connected seamlessly end-to-end, you will need an extension connector cable. This accessory allows you to bridge the gap between two light bars, offering more flexibility in how you position your lights.
3. Mounting Accessories
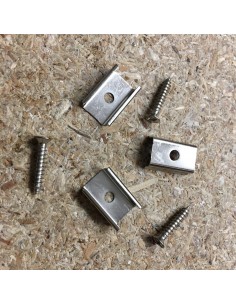
Mounting clips are also available to ensure that your under-cabinet lights are securely attached to the desired surface. This helps to achieve a clean installation without sagging or shifting over time. All necessary mounting accessories can be found in the "Related Products" tab of the product pages.
Using the "Related Products" Tab
When browsing our product pages, you will notice a "Related Products" tab. This section is specifically designed to make your shopping experience easier by providing all compatible accessories for the product you are viewing. For example, if you are looking at an under-cabinet light, you will find connectors, drivers, mounting clips, and other essential accessories listed under the "Related Products" tab. This helps ensure that you have everything you need for a successful installation.
Checking Stock Levels
Our website provides live stock levels for each product. You can check the availability of any item by visiting the product page—stock information is displayed clearly above the product price. If a product is out of stock, it will be indicated along with the expected restock date or the option to pre-order.
Searching by Reference Number
To make finding specific products even easier, you can use the reference numbers provided in this guide or on our product pages. Simply enter the reference number into the search bar on our website to quickly locate the exact item you need. This feature is particularly useful if you already know which accessories or components you are looking for.
Product Updates and Upgrades
Please note that we continually upgrade our products to offer better value and improved technology. As a result, some of the products or reference numbers mentioned in this guide may change over time. However, the core concepts and installation methods remain the same, ensuring that you always receive the best quality available.
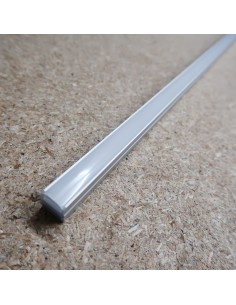
Professional Installation Option: ALU002-2M Aluminium LED Profile
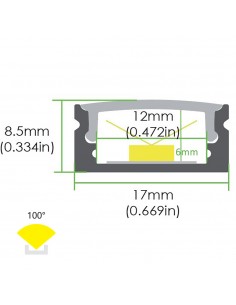
Another popular approach among professionals is to use our ALU002-2M aluminium LED profile, which comes with a high-quality PMMA diffuser. This solution offers exceptional quality and flexibility, allowing you to choose the perfect LED strip from our extensive collection to fit inside the profile. While this method requires some DIY work, such as cutting the profile to size and installing the strip, it provides a fully customised lighting solution that can be built into your cabinets. This professional-grade setup offers unparalleled control and quality, although it is less straightforward compared to using our linkable under-cabinet lights.
Key Considerations for Installation
When planning your under-cabinet lighting, it is important to consult a qualified electrician for installation. Working with electrical components requires expertise to ensure safety and compliance with regulations. Here are some considerations:
-
Power Load Distribution: To avoid overloading the driver, you can use multiple LED drivers for different circuits. This will provide independent power supplies for each section of lights, which is particularly useful for larger installations.
-
Environment: Determine if the installation environment requires waterproof (IP67) or non-waterproof (IP20) components. Waterproof drivers and connectors are ideal for areas exposed to moisture, while non-waterproof options are suitable for dry, indoor environments.
-
Accessibility: Ensure that all components, including drivers and connectors, are accessible for future maintenance or replacement. This is particularly important for long-term reliability and ease of repair.
Conclusion
Setting up linkable under-cabinet lighting is a straightforward yet impactful way to enhance your workspace. By choosing the correct components, ensuring proper power supply headroom, and using the right accessories, you can create a professional, durable, and highly effective lighting solution.
Remember, each project is unique, and while our products are designed to provide flexibility and quality, having a qualified electrician perform the installation is key to ensuring both safety and success. If you have further questions, our team is always available to help guide you through the process and recommend the right products for your needs.
For more information on our products, visit our website at www.hiline-lighting.co.uk.
